Record cold weather, day job and family have put the XPS laminating tests on hold for the moment. Last Friday 13 inches of snow shut down my little rural community. The bright light reflecting off snow through my patio door was perfect for modifying an aquarium air pump though.
Gdaddy at swaylocks.com posted about how he converted a Whisper AP 150 aquarium air pump for suction. He uses it for vacuum bagging composite laminations. He used the same conversion method found at the following link, but for an AP 150. Gdaddy reported he could get 10-11inches of vacuum pressure -- I will assume inches of "mercury."
http://www.instructables.com/id/Vacuum-Pump-from-Aquarium-Air-Pump/
The pump he modified had a similar internal pumping configuration as this one:
http://cdn.instructables.com/F49/J0QJ/GHFK7LR8/F49J0QJGHFK7LR8.MEDIUM.jpg

The Whisper AP 150 is a diaphragm pump made for use in deeper water, reported to work at a water depth of 96 inches. I bought two of the new Whisper AP 150 air pumps on the internet for a good price last year. When I opened them up for conversion, the new 150s had been re-designed (pictures below) since the older AP 150 model Gdaddy used (above).
If you have the patience for disassembly, modification and re-assembly; the Whisper AP 150 shown below can be modified for suction with minor changes. I did it last Friday (03/06/15). Rather than blowing air, the output jet now sucks air. (I am assuming the newer AP 300s have the similar center plate diaphragm mounting configuration),
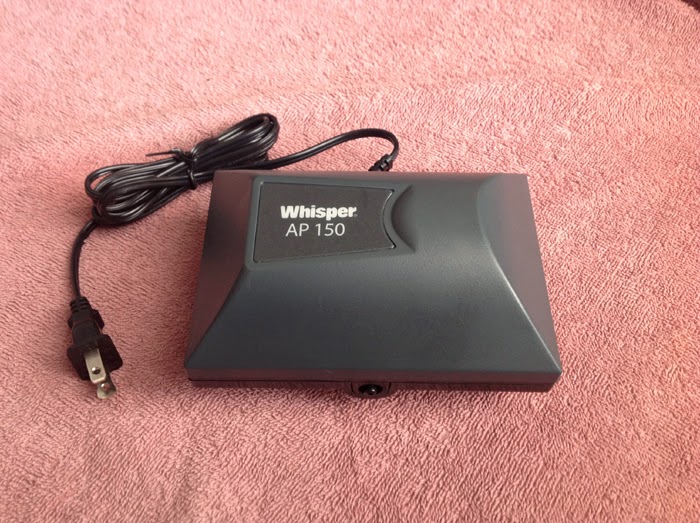
New Whisper AP 150 aquarium air pump

View of internal works -- electromagnet, armatures, armature magnets and diaphragms.

Armatures with magnets and diaphragms extended to expose clear plastic valve housings.

AP 150 with internal works removed from housing.

Close-up of clear plastic valve housing in normal position, electromagnet on the right.

Tools for modifying the pump for suction/vacuum; hacksaw blade, small file, Phillips head screwdriver, Q-tip and vaseline. Vaseline makes re-installing diaphragms much easier.

Side view of internal works with clear plastic valve housing in normal position, electromagnet on the left. Note groove over black plastic ridge at bottom right of valve housing.

Close-up of clear plastic valve housing in normal position, electromagnet on the left. Note groove over black plastic ridge at bottom right of valve housing. Remove screws from valve housings with Phillips head screwdriver. Remove clear plastic valve housings and cut new grooves with hacksaw blade and small file.

Modified clear plastic valve housings with new grooves (one each) to allow 180 degree rotation from normal position.

Close up of clear plastic valve housing rotated 180 degrees from normal position. Note cut groove added is over black plastic ridge at bottom right of valve housing. Fully visible translucent valve flapper is closest to the electromagnet. With clear plastic valve covers each rotated 180 degrees, the Whisper AP 150 will now suck air through the nozzle where air was previously discharged for delivery to aquariums/aquatic tanks.
_____
Below are pictures of the bottom of the AP 150 the round plastic piece is the air filter cover/retainer. The white pad is the air filter. When functioning normally, air intake is through retainer and the filter. But when modified for suction air is discharged through the filter and then the filter retainer. I found that by removing the retainer and filter that air discharge from the pump housing was improved. And as a result of reduced resistance to air discharge, I could feel an increase in suction. I will probably increase the diameters of the 4 holes in the bottom below where the filter was formerly placed -- to reduce air discharge resistance further and hopefully improve suction a little more.

Circular air filter retainer is attached to the bottom, holding the filter element in place.

Air filter retainer and air filter element are removed. The four holes in the housing bottom that facilitate air flow are visible. Normally they are covered by the filter and retainer. Removing the filter and retainer reduces resistance to air flow. Since air is now being discharged through the 4 bottom holes, the air filter serves no practical purpose. Enlarging these 4 holes will likely reduce resistance to air-flow discharge further.
Gdaddy at swaylocks.com posted about how he converted a Whisper AP 150 aquarium air pump for suction. He uses it for vacuum bagging composite laminations. He used the same conversion method found at the following link, but for an AP 150. Gdaddy reported he could get 10-11inches of vacuum pressure -- I will assume inches of "mercury."
http://www.instructables.com/id/Vacuum-Pump-from-Aquarium-Air-Pump/
The pump he modified had a similar internal pumping configuration as this one:
http://cdn.instructables.com/F49/J0QJ/GHFK7LR8/F49J0QJGHFK7LR8.MEDIUM.jpg
The Whisper AP 150 is a diaphragm pump made for use in deeper water, reported to work at a water depth of 96 inches. I bought two of the new Whisper AP 150 air pumps on the internet for a good price last year. When I opened them up for conversion, the new 150s had been re-designed (pictures below) since the older AP 150 model Gdaddy used (above).
If you have the patience for disassembly, modification and re-assembly; the Whisper AP 150 shown below can be modified for suction with minor changes. I did it last Friday (03/06/15). Rather than blowing air, the output jet now sucks air. (I am assuming the newer AP 300s have the similar center plate diaphragm mounting configuration),
New Whisper AP 150 aquarium air pump
View of internal works -- electromagnet, armatures, armature magnets and diaphragms.
Armatures with magnets and diaphragms extended to expose clear plastic valve housings.
AP 150 with internal works removed from housing.
Close-up of clear plastic valve housing in normal position, electromagnet on the right.
Tools for modifying the pump for suction/vacuum; hacksaw blade, small file, Phillips head screwdriver, Q-tip and vaseline. Vaseline makes re-installing diaphragms much easier.
Side view of internal works with clear plastic valve housing in normal position, electromagnet on the left. Note groove over black plastic ridge at bottom right of valve housing.
Modified clear plastic valve housings with new grooves (one each) to allow 180 degree rotation from normal position.
Close up of clear plastic valve housing rotated 180 degrees from normal position. Note cut groove added is over black plastic ridge at bottom right of valve housing. Fully visible translucent valve flapper is closest to the electromagnet. With clear plastic valve covers each rotated 180 degrees, the Whisper AP 150 will now suck air through the nozzle where air was previously discharged for delivery to aquariums/aquatic tanks.
_____
Below are pictures of the bottom of the AP 150 the round plastic piece is the air filter cover/retainer. The white pad is the air filter. When functioning normally, air intake is through retainer and the filter. But when modified for suction air is discharged through the filter and then the filter retainer. I found that by removing the retainer and filter that air discharge from the pump housing was improved. And as a result of reduced resistance to air discharge, I could feel an increase in suction. I will probably increase the diameters of the 4 holes in the bottom below where the filter was formerly placed -- to reduce air discharge resistance further and hopefully improve suction a little more.
Circular air filter retainer is attached to the bottom, holding the filter element in place.
Air filter retainer and air filter element are removed. The four holes in the housing bottom that facilitate air flow are visible. Normally they are covered by the filter and retainer. Removing the filter and retainer reduces resistance to air flow. Since air is now being discharged through the 4 bottom holes, the air filter serves no practical purpose. Enlarging these 4 holes will likely reduce resistance to air-flow discharge further.
nice blog and its quite useful thanks for sharing your information. aquarium air pump india
ReplyDeleteNice post.
ReplyDeletehttps://freshwaterfish.hatenablog.com/